I have decided that trying to keep up with three different blogs was just too much! So I have decided to cut it down to one. I will still share recipes, but there will be other things as well.
http://beautifulirish-myworld.blogspot.com/ Here is the link, come follow!!!
Tuesday, September 20, 2011
Sunday, September 18, 2011
A Cute Fall Snack
I came across this really cute snack idea online. It was great because Cameron could put it together himself! All it took was Hershey Kisses, mini Nilla wafers, peanut butter and a peanut butter chip!

Before......

After!!!!

Before......

After!!!!
Thursday, September 15, 2011
The Long Awaited Mac n Cheese Recipe
While my husband was in basic training I lived with my in laws. My father in law is a pretty good cook, and I took advantage of the time to learn some basics from him. The thing I have used the most is his cream sauce, which I have added some wonderfulness and turned into a mac n cheese that is loved by many!
Ingredients:
1 box macaroni noodles
3 Tbsp butter
3 Tbsp flour
1 cup heavy cream
2 cups milk
1 lb grated cheese ( I like a mix of colby and sharp chedder)
1/4 tsp nutmeg
salt/pepper
1/2 tsp hot pepper flakes
1/2 tsp smoked paprika
1/2 sleeve crushed ritz crackers
Cook pasta according to package and set aside.
Melt butter in a large saucepan. Add flour and cook on medium heat for about 3-4 minutes. Add cream and milk. Add nutmeg, salt, pepper, pepper flakes and paprika to the sauce. Cook until thickened, stirring occasionally on medium heat. Turn off heat and add cheese and stir until melted.
Combine sauce and pasta. Sprinkle crushed ritz on top. Bake in a 350 oven, covered for 30 minutes. Remove cover and bake an additional 15 minutes, until the cheese is bubbly! Enjoy!

Sales are Mothers of Invention

This evening I have book club, it is one of my favorite nights of the month. So I decided I would do something with the raspberries to bring to the girls.
I came up with a chocolate raspberry cheesecake cupcake. I combined my favorite chocolate cake recipe, with a cheesecake concoction and ended up with a very tasty morsel!
Beatty's Chocolate Cake (this is an Ina Garten recipe that I LOVE!!!!)
Ingredients
1 3/4 cups all-purpose flour
2 cups sugar
3/4 cups good cocoa powder
2 teaspoons baking soda
1 teaspoon baking powder
1 teaspoon kosher salt
1 cup buttermilk, shaken
1/2 cup vegetable oil
2 extra-large eggs, at room temperature
1 teaspoon pure vanilla extract
1 cup freshly brewed hot coffee ( I used French Vanilla coffee for the cupcakes.)
Cheesecake Filling
1 pkg cream cheese, room temperature
2 Tbsp powdered sugar
1 cup fresh raspberries
1 egg
Directions
Preheat the oven to 350 degrees F. Prepare muffin tins with either papers or grease and flour them.
Sift the flour, sugar, cocoa, baking soda, baking powder, and salt into the bowl of an electric mixer fitted with a paddle attachment and mix on low speed until combined. In another bowl, combine the buttermilk, oil, eggs, and vanilla. With the mixer on low speed, slowly add the wet ingredients to the dry. With mixer still on low, add the coffee and stir just to combine, scraping the bottom of the bowl with a rubber spatula.
For the filling: cream together the cream cheese and egg, add raspberries and sugar and beat until smooth.
To fill the tins: Put about a Tbsp of the batter in the cup. Add 1 tsp of the cheesecake filling, then add another Tbsp of the batter on top.
Bake at 350 for between 20 and 25 min. Take them out and let them cool. I frosted them with store bought dark chocolate icing. ( I didn't have all the ingredients for my favorite frosting)

Monday, September 12, 2011
Welcome Fall!!!

While it isn't "officially" fall yet, I decided to start the season right with some lovely pumpkin chocolate chip muffins. I like muffins because I have better success with them then with loaves of quick breads. The middle is never quite right with the loaves, so muffins are my friends.
I found the recipe on all recipes.com. It isn't bad at all, they are quite yummy! However, next time I think I am going to use brown sugar instead of white and maybe add a bit more pumpkin. I am also going to bake them at 375 instead of 400 degrees. The tops got a little brown.
Ingredients
3/4 cup white sugar
1/4 cup vegetable oil
2 eggs
3/4 cup canned pumpkin
1/4 cup water
1 1/2 cups all-purpose flour
3/4 teaspoon baking powder
1/2 teaspoon baking soda
1/4 teaspoon ground cloves
1/2 teaspoon ground cinnamon
1/4 teaspoon salt
1/4 teaspoon ground nutmeg
1/2 cup semisweet chocolate chips
Directions
Preheat the oven to 400 degrees F (200 degrees C). Grease and flour muffin pan or use paper liners.
Mix sugar, oil, eggs. Add pumpkin and water. In separate bowl mix together the baking flour, baking soda, baking powder, spices and salt.. Add wet mixture and stir in chocolate chips.
Fill muffin cups 2/3 full with batter. Bake in preheated oven for 20 to 25 minutes.

Over all it was a great way to start off the fall season!!
Saturday, August 27, 2011
Creative Leftovers
The other day I made a large pot of sausage spaghetti sauce. We had alot leftover and I had to come up with a way to use it. I was out of spaghetti noodles and with Hurricane Irene quickly approaching I wasn't about to brave the commissary just for spaghetti noodles! So I got creative and turned it into a wonderful soup! It was a cross between pasta fagoli and minestrone. It was filling and delicious and a great way to use leftovers.
Slowcooker Sausage Spaghetti Sauce
1 lb Italian Sausage
1 onion, chopped
2 cloves garlic
1 cup sliced mushroom
1 green pepper, chopped
1/2 cup chopped carrots
1 zuchinni chopped
1 cup red wine (optional)
2 cans diced tomatoes
2 can tomato sauce
3 Tblsp tomato paste
2 Tblsp balsamic vinegar
3 tsp oregano
2 tsp basil
salt and pepper to taste
Brown sausage in a pan. Add it to the slowcooker and then add all the rest of the ingredients. Cook for 6 hours on low.
Serve over your favorite pasta.
Turning the Sauce into soup!
Put leftover sauce into the slowcooker. Add two cans of beef broth and one can kidney beans. Cook on low for four hours. About 45 minutes before you want to eat switch for high and add 1/2 a box of macaroni.
Enjoy!!
Saturday, August 20, 2011
It's Time Again....
....for another restaurant review!
From August 7th - 14th I had the privilege of spending the week with a bunch of my girlfriends in beautiful Emerald Isle, NC. It was a relaxing week full of laughs, sun, fun, and a little bit of wine every now and then!
Each night we cooked dinner, split into pairs it was kinda fun to see different people's taste's and cooking techniques and I picked up a few tips!
On Friday night we headed into Beaufort, NC for a night out. Our fearless leader led us to "The Spouter Inn Restaurant". Located right on the water, you couldn't ask for a better view for dinner.
We started out with a wonderful crab dip, paired with grilled pita bread. Being from Maryland, I was used to a baguette to enjoy my crab dip, but the pita had a wonderful smokiness from being grilled that enhanced the cream flavor and texture of the crab.
After the crab dip, I started my dinner with their house salad, which instead of the normal iceberg, was comprised of lovely dark leafy greens. I chose their citrus cilantro dressing. It was so refreshing! I am determined to figure out the ingredients and make it myself. Not only was it good on the salad, but it was wonderful to dip the homemade bread in. I contemplated buying a pint, but was afraid it wouldn't last the trip home.
I chose to have one of their appetizers for my entree. I chose to do that because they have a bakery attached, and I wanted to make sure I had room for dessert!
I chose their sesame seared tuna, with a soy glaze and wasabi aioli. The pickled ginger that accompanied it was artfully crafted into a rose.
It tasted as good as it looked. The wasabi was not overpowering at all. I could still taste the delicate flavor of the tuna. The sesame sear provided a lovely crunch before the tuna melted in your mouth. Then came the desserts.....you can tell that they were baked fresh. I think between all of us at the table we ordered the entire dessert menu! I split the carrot cake and the chocolate silk pie with my friend. The carrot cake was the best I have ever tasted. The carrot cake was moist and delicious. The cream cheese frosting brought the sweet flavor of the carrot and the spices together seamlessly. The pie's crust was flakey and light. The chocolate was the proper mixture of bitter and sweet. The whipped cream on top was light, sweet and fluffy.
The whole dinner was made even more wonderful by the service. We were treated like we were the only guests there, and we were there on a busy Friday night. The servers were attentive, but not overbearing. Our glasses were never empty, and the servers were very knowlegeable about the menu, and even took the time to find out the answers to certain questions about the ingredients.
To further endear the restaurant to us, as we were leaving we saw a fisherman bring his catch, fresh off his boat into the restaurant to be used that evening. Can you
say fresh?!?!?!?
The dinner at Spouter Inn was a wonderful addition to a fun girls week!
 All dressed up for girls night out!
From August 7th - 14th I had the privilege of spending the week with a bunch of my girlfriends in beautiful Emerald Isle, NC. It was a relaxing week full of laughs, sun, fun, and a little bit of wine every now and then!
Each night we cooked dinner, split into pairs it was kinda fun to see different people's taste's and cooking techniques and I picked up a few tips!
On Friday night we headed into Beaufort, NC for a night out. Our fearless leader led us to "The Spouter Inn Restaurant". Located right on the water, you couldn't ask for a better view for dinner.
We started out with a wonderful crab dip, paired with grilled pita bread. Being from Maryland, I was used to a baguette to enjoy my crab dip, but the pita had a wonderful smokiness from being grilled that enhanced the cream flavor and texture of the crab.
After the crab dip, I started my dinner with their house salad, which instead of the normal iceberg, was comprised of lovely dark leafy greens. I chose their citrus cilantro dressing. It was so refreshing! I am determined to figure out the ingredients and make it myself. Not only was it good on the salad, but it was wonderful to dip the homemade bread in. I contemplated buying a pint, but was afraid it wouldn't last the trip home.
I chose to have one of their appetizers for my entree. I chose to do that because they have a bakery attached, and I wanted to make sure I had room for dessert!
I chose their sesame seared tuna, with a soy glaze and wasabi aioli. The pickled ginger that accompanied it was artfully crafted into a rose.
It tasted as good as it looked. The wasabi was not overpowering at all. I could still taste the delicate flavor of the tuna. The sesame sear provided a lovely crunch before the tuna melted in your mouth.

The whole dinner was made even more wonderful by the service. We were treated like we were the only guests there, and we were there on a busy Friday night. The servers were attentive, but not overbearing. Our glasses were never empty, and the servers were very knowlegeable about the menu, and even took the time to find out the answers to certain questions about the ingredients.
To further endear the restaurant to us, as we were leaving we saw a fisherman bring his catch, fresh off his boat into the restaurant to be used that evening. Can you
say fresh?!?!?!?
The dinner at Spouter Inn was a wonderful addition to a fun girls week!

Tuesday, July 26, 2011
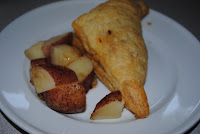
What Hot Pockets Should Be
I have recently discovered that puff pastry should be a staple in everyone's home! It is so easy to work with and can be used in both sweet and savory ways.
Last week I used it to make "hot pockets" for dinner. They were a hit with both kids, and I used the left over filling in a pasta salad two nights later.
Ingredients:
1 sheet puff pastry thawed according to package directions
chicken broth
1 chicken breast
2 Tbsp olive oil
1 onion
5 or 6 mushroom sliced
2 cloves garlic, minced
2 tomatoes, chopped
2 Tbsp sundried tomatoes
2 Tbsp cooking sherry
salt and pepper to taste
2 cups raw spinach
1 cup mozzarella cheese
Directions:
Put raw chicken breast in a pan, cover with chicken broth. Bring broth to a simmer and let it cook the chicken breast all the way through.
Meanwhile, heat olive oil in a pan, saute onion and garlic on medium heat till onions are a light brown. Add mushroom and tomatoes and cook for about 5 minutes longer. Then add sundried tomatoes, spinach, sherry and salt and pepper and cook till the spinach is wilted. Take off heat.
Lightly flour a work surface and roll out your puff pastry. Cut in into four equal squares. Add the mozzarella cheese to the filling mixture, and put a healthy spoonful of the filling in the middle of the pastry squares and fold into a triangle. Press the edges firmly together, put on baking sheet. Prick the top of the pastry with a fork.
Bake at 375 for about 25 minutes, till pastry is brown and puffy.
Enjoy!
Last week I used it to make "hot pockets" for dinner. They were a hit with both kids, and I used the left over filling in a pasta salad two nights later.
Ingredients:
1 sheet puff pastry thawed according to package directions
chicken broth
1 chicken breast
2 Tbsp olive oil
1 onion
5 or 6 mushroom sliced
2 cloves garlic, minced
2 tomatoes, chopped
2 Tbsp sundried tomatoes
2 Tbsp cooking sherry
salt and pepper to taste
2 cups raw spinach
1 cup mozzarella cheese
Directions:
Put raw chicken breast in a pan, cover with chicken broth. Bring broth to a simmer and let it cook the chicken breast all the way through.

Meanwhile, heat olive oil in a pan, saute onion and garlic on medium heat till onions are a light brown. Add mushroom and tomatoes and cook for about 5 minutes longer. Then add sundried tomatoes, spinach, sherry and salt and pepper and cook till the spinach is wilted. Take off heat.
Lightly flour a work surface and roll out your puff pastry. Cut in into four equal squares. Add the mozzarella cheese to the filling mixture, and put a healthy spoonful of the filling in the middle of the pastry squares and fold into a triangle. Press the edges firmly together, put on baking sheet. Prick the top of the pastry with a fork.
Bake at 375 for about 25 minutes, till pastry is brown and puffy.
Enjoy!

Tuesday, July 5, 2011
My "Go To" Cake
I love when I can find one recipe that can be changed to fit any occasion. "Beatty's Chocolate Cake", from Ina's Garten's cookbook, "Barefoot Contessa at Home", is one of those recipes.
I discovered it last year when Cameron wanted a chocolate raspberry cake for his birthday. So I added 1/4 cup of raspberry jam to the batter and 2 Tbsp of raspberry jam to the chocolate frosting.
This year he wanted a chocolate blackberry cake for his birthday, so I used the same recipe using blackberry jam instead of raspberry and it was met with rave reviews!!
Beatty's Chocolate Cake
Ingredients
Butter, for greasing the pans
1 3/4 cups all-purpose flour, plus more for pans
2 cups sugar
3/4 cups good cocoa powder
2 teaspoons baking soda
1 teaspoon baking powder
1 teaspoon kosher salt
1 cup buttermilk, shaken
1/2 cup vegetable oil
2 extra-large eggs, at room temperature
1 teaspoon pure vanilla extract
1 cup freshly brewed hot coffee
Chocolate Buttercream, recipe follows
Directions
Preheat the oven to 350 degrees F. Butter two 8-inch x 2-inch round cake pans. Line with parchment paper, then butter and flour the pans.
Sift the flour, sugar, cocoa, baking soda, baking powder, and salt into the bowl of an electric mixer fitted with a paddle attachment and mix on low speed until combined. In another bowl, combine the buttermilk, oil, eggs, and vanilla. With the mixer on low speed, slowly add the wet ingredients to the dry. With mixer still on low, add the coffee and stir just to combine, scraping the bottom of the bowl with a rubber spatula. Pour the batter into the prepared pans and bake for 35 to 40 minutes, until a cake tester comes out clean. Cool in the pans for 30 minutes, then turn them out onto a cooling rack and cool completely.
Place 1 layer, flat side up, on a flat plate or cake pedestal. With a knife or offset spatula, spread the top with frosting. Place the second layer on top, rounded side up, and spread the frosting evenly on the top and sides of the cake.
Chocolate Frosting:
6 ounces good semisweet chocolate (recommended: Callebaut)
1/2 pound (2 sticks) unsalted butter, at room temperature
1 extra-large egg yolk, at room temperature
1 teaspoon pure vanilla extract
1 1/4 cups sifted confectioners' sugar
1 tablespoon instant coffee powder
Chop the chocolate and place it in a heat-proof bowl set over a pan of simmering water. Stir until just melted and set aside until cooled to room temperature.
In the bowl of an electric mixer fitted with a paddle attachment, beat the butter on medium-high speed until light yellow and fluffy, about 3 minutes. Add the egg yolk and vanilla and continue beating for 3 minutes. Turn the mixer to low, gradually add the confectioners' sugar, then beat at medium speed, scraping down the bowl as necessary, until smooth and creamy. Dissolve the coffee powder in 2 teaspoons of the hottest tap water. On low speed, add the chocolate and coffee to the butter mixture and mix until blended. Don't whip! Spread immediately on the cooled cake.

The chocolate blackberry cake

Yummy chocolate raspberry!
Sunday, June 26, 2011
The True Confessions of a Food Snob's Wife

My dear husband is what I like to call a "food snob". He likes what he likes, he knows how he likes it and he is vocal about it.
He and I grew up in two very different food households. The first year of marriage was interesting, and I tried to meld the two, with some success, and some very bad catastrophe's! (ie..MeatBall Meatloaf)
So after five years of marriage, and countless dinners, I have been able to meld what I like and what he likes. I have also been able to work his "champagne taste's" with our "beer budget".
The biggest thing I have figured out, is that we can afford the things he likes, if I can get creative and use them in mulitple meals.
For example. He loves pot roast, but it can be kinda pricey. We could only budget it a few times a year.
However, recently I discovered Ina Garten's "Company Pot Roast". The first time I made it I realized that we had TONS of left over sauce. I wasn't sure what to do with it, but being as I don't like to waste anything I froze it.
I ended up using the sauce to make a very wonderful Shepherd's Pie. Because the roast had been cooked in it along with all the vegetables it provided layers upon layers of flavor.
In fact I was able to make two whole shepherds pies with the sauce. Plus, even before that we had made open faced pot roast sandwiches with the left over meat from the roast.
So yes, the roast was about 10.00, but I was able to get about 5 meals total from it!!
Here is Ina's Pot Roast recipe:
Ingredients
1 (4 to 5-pound) prime boneless beef chuck roast, tied
Kosher salt and freshly ground black pepper
All-purpose flour
Good olive oil
2 cups chopped carrots (4 carrots)
2 cups chopped yellow onions (2 onions)
2 cups chopped celery (4 stalks)
2 cups chopped leeks, white and light green parts (2 to 4 leeks)
5 large garlic cloves, peeled and crushed
2 cups good red wine, such as Burgundy
2 tablespoons Cognac or brandy ( I used Sherry)
1 (28-ounce) can whole plum tomatoes in puree
1 cup chicken stock, preferably homemade
1 chicken bouillon cube
3 branches fresh thyme
2 branches fresh rosemary
1 tablespoon unsalted butter, at room temperature
Directions
Preheat the oven to 325 degrees F.
Pat the beef dry with a paper towel. Season the roast all over with 1 tablespoon salt and 1 1/2 teaspoons pepper. Dredge the whole roast in flour, including the ends. In a large Dutch oven, heat 2 tablespoons olive oil over medium heat. Add the roast and sear for 4 to 5 minutes, until nicely browned. Turn and sear the other side and then turn and sear the ends. This should take 4 to 5 minutes for each side. Remove the roast to a large plate.
Add 2 tablespoons olive oil to the Dutch oven. Add the carrots, onions, celery, leeks, garlic, 1 tablespoon salt, and 1 1/2 teaspoons pepper and cook over medium heat for 10 to 15 minutes, stirring occasionally, until tender but not browned. Add the wine and Cognac and bring to a boil. Add the tomatoes, chicken stock, bouillon cube, 2 teaspoons salt, and 1 teaspoon pepper. Tie the thyme and rosemary together with kitchen string and add to the pot. Put the roast back into the pot, bring to a boil, and cover. Place in the oven for 2 1/2 hours, until the meat is fork tender or about 160 degrees F internally. Turn the heat down to 250 degrees F after about an hour to keep the sauce at a simmer.
Remove the roast to a cutting board. Remove the herb bundle and discard. Skim off as much fat as possible from the sauce. Transfer half the sauce and vegetables to a blender or a food processor fitted with the steel blade and puree until smooth. Pour the puree back into the pot, place on the stovetop over low heat, and return the sauce to a simmer. Place 2 tablespoons flour and the butter in a small bowl and mash them together with a fork. Stir into the sauce and simmer for 2 minutes, stirring until thickened. Taste for seasonings. Remove the strings from the roast, and slice the meat. Serve warm with the sauce spooned over it.
And here is how I changed it into Shepherds Pie!
Ingredients:
1 lb ground beef
1 small onion, diced
2 cloves of garlic, minced
1 package of frozen veggies (I like peas, carrot, corn and green beans)
1/2 cup of the red wine that you used in the roast
1/2 tsp rosemary (dried or fresh)
1 tsp oregano (dried or fresh)
salt and pepper to taste
pot roast sauce
Topping:
4 Cups mashed potatoes (about 5-8 medium potatoes)
2 Cups shredded cheddar cheese
1/2 cup sour cream
salt and pepper to taste
2 Tblsp butter, melted
Brown ground beef with the onions and garlic. Drain off fat. Add pot roast sauce. Cook for about 5 minutes on medium low heat. Add wine, rosemary, oregano and the salt and pepper. Simmer on low heat for about an hour. Add veggies and cook for about 15 minutes longer.
The the filling is simmering boil your potatoes. Mash them with the cheese and sour cream. Add salt and pepper.
Put the filling in a 13x9 baking dish. Top with potatoes. Pour over melted butter and bake at 350 for 45 minutes.
*This can be made ahead of time, just don't pour the melted butter over the potatoes until it is time to bake.*
Sunday, June 19, 2011
A Father's Day Brunch
Today was an awesome Fathers Day for Andrew. He got to pick up Patience at 9:05am from the airport. I decided to have a little Daddy Daughter brunch waiting for them when they got home.
I made Ina Garten's Blueberry Crumb Cake. As usual, with her recipes it turned out wonderfully delicious!
Blue Berry Crumb Cake
Ingredients
For the streusel:
1/4 cup granulated sugar
1/3 cup light brown sugar, lightly packed
1 teaspoon ground cinnamon
1/8 teaspoon ground nutmeg
1/4 pound (1 stick) unsalted butter, melted
1 1/3 cups all-purpose flour
For the cake:
6 tablespoons unsalted butter, at room temperature (3/4 stick)
3/4 cup granulated sugar
2 extra-large eggs, at room temperature
1 teaspoon pure vanilla extract
1/2 teaspoon grated lemon zest
2/3 cup sour cream
1 1/4 cups all-purpose flour
1 teaspoon baking powder
1/4 teaspoon baking soda
1/2 teaspoon kosher salt
1 cup fresh blueberries
Confectioners' sugar for sprinkling
Directions
Preheat the oven to 350 degrees F. Butter and flour a 9-inch round baking pan.
For the streusel:
Combine the granulated sugar, brown sugar, cinnamon, and nutmeg in a bowl. Stir in the melted butter and then the flour. Mix well and set aside.
For the cake:
Cream the butter and sugar in the bowl of an electric mixer fitted with the paddle attachment on high speed for 4 to 5 minutes, until light. Reduce the speed to low and add the eggs 1 at a time, then add the vanilla, lemon zest, and sour cream. In a separate bowl, sift together the flour, baking powder, baking soda, and salt. With the mixer on low speed, add the flour mixture to the batter until just combined. Fold in the blueberries and stir with a spatula to be sure the batter is completely mixed.
Spoon the batter into the prepared pan and spread it out with a knife. With your fingers,crumble the topping evenly over the batter. Bake for 40 to 50 minutes, until a cake tester comes out clean. Cool completely and serve sprinkled with confectioners' sugar.
 The yummy, yummy cake!
 The setting....
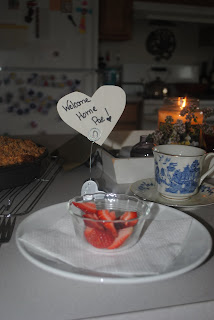 Pae's place setting...it is good to have her here!
 She is fascinated with all things Paris, so the candle was
perfect....the scent...."Springtime in Paris"
I made Ina Garten's Blueberry Crumb Cake. As usual, with her recipes it turned out wonderfully delicious!
Blue Berry Crumb Cake
Ingredients
For the streusel:
1/4 cup granulated sugar
1/3 cup light brown sugar, lightly packed
1 teaspoon ground cinnamon
1/8 teaspoon ground nutmeg
1/4 pound (1 stick) unsalted butter, melted
1 1/3 cups all-purpose flour
For the cake:
6 tablespoons unsalted butter, at room temperature (3/4 stick)
3/4 cup granulated sugar
2 extra-large eggs, at room temperature
1 teaspoon pure vanilla extract
1/2 teaspoon grated lemon zest
2/3 cup sour cream
1 1/4 cups all-purpose flour
1 teaspoon baking powder
1/4 teaspoon baking soda
1/2 teaspoon kosher salt
1 cup fresh blueberries
Confectioners' sugar for sprinkling
Directions
Preheat the oven to 350 degrees F. Butter and flour a 9-inch round baking pan.
For the streusel:
Combine the granulated sugar, brown sugar, cinnamon, and nutmeg in a bowl. Stir in the melted butter and then the flour. Mix well and set aside.
For the cake:
Cream the butter and sugar in the bowl of an electric mixer fitted with the paddle attachment on high speed for 4 to 5 minutes, until light. Reduce the speed to low and add the eggs 1 at a time, then add the vanilla, lemon zest, and sour cream. In a separate bowl, sift together the flour, baking powder, baking soda, and salt. With the mixer on low speed, add the flour mixture to the batter until just combined. Fold in the blueberries and stir with a spatula to be sure the batter is completely mixed.
Spoon the batter into the prepared pan and spread it out with a knife. With your fingers,crumble the topping evenly over the batter. Bake for 40 to 50 minutes, until a cake tester comes out clean. Cool completely and serve sprinkled with confectioners' sugar.


perfect....the scent...."Springtime in Paris"
Saturday, June 11, 2011
Birthday Party Fun!
Today was Cameron's 5th Birthday Party! It was a pirate themed party!
I am quite proud of my creations for the party!
The idea for the cake was found in a "Family Fun" magazine. I love the fact that it was created by putting cupcakes together! Cupcakes are so much easier than a big cake for kids parties. For the goody bags I made pirate lollipops. So easy! I bought the molds for under 2.00 and then just melted chocolate and popped in a stick! Super yummy...super easy!

I have recently discovered how to make marshmallows. For his party I dyed them yellow so that the kids could have edible gold pieces for their goody bags! I used Alton Browns recipe:
Ingredients
3 packages unflavored gelatin
1 cup ice cold water, divided
12 ounces granulated sugar, approximately 1 1/2 cups
1 cup light corn syrup
1/4 teaspoon kosher salt
1 teaspoon vanilla extract
1/4 cup confectioners' sugar
1/4 cup cornstarch
Nonstick spray
Directions
Place the gelatin into the bowl of a stand mixer along with 1/2 cup of the water. Have the whisk attachment standing by.
In a small saucepan combine the remaining 1/2 cup water, granulated sugar, corn syrup and salt. Place over medium high heat, cover and allow to cook for 3 to 4 minutes. Uncover, clip a candy thermometer onto the side of the pan and continue to cook until the mixture reaches 240 degrees F, approximately 7 to 8 minutes. Once the mixture reaches this temperature, immediately remove from the heat.
Turn the mixer on low speed and, while running, slowly pour the sugar syrup down the side of the bowl into the gelatin mixture. Once you have added all of the syrup, increase the speed to high. Continue to whip until the mixture becomes very thick and is lukewarm, approximately 12 to 15 minutes. Add the vanilla during the last minute of whipping. While the mixture is whipping prepare the pans as follows.
For regular marshmallows:
Combine the confectioners' sugar and cornstarch in a small bowl. Lightly spray a 13 by 9-inch metal baking pan with nonstick cooking spray. Add the sugar and cornstarch mixture and move around to completely coat the bottom and sides of the pan. Return the remaining mixture to the bowl for later use.
When ready, pour the mixture into the prepared pan, using a lightly oiled spatula for spreading evenly into the pan. Dust the top with enough of the remaining sugar and cornstarch mixture to lightly cover. Reserve the rest for later. Allow the marshmallows to sit uncovered for at least 4 hours and up to overnight.
Turn the marshmallows out onto a cutting board and cut into 1-inch squares using a pizza wheel dusted with the confectioners' sugar mixture. Once cut, lightly dust all sides of each marshmallow with the remaining mixture, using additional if necessary. Store in an airtight container for up to 3 weeks.
For miniature marshmallows:
Combine the confectioners' sugar and cornstarch in a small bowl. Line 4 half sheet pans with parchment paper, spray the paper with nonstick cooking spray and dust with the confectioners' sugar mixture.
Scoop the mixture into a piping bag fitted with a 1/2-inch round piping tip. Pipe the mixture onto the prepared sheet pans lengthwise, leaving about 1-inch between each strip. Sprinkle the tops with enough of the remaining cornstarch and sugar mixture to lightly cover. Let the strips set for 4 hours or up to overnight.
Cut into 1/2 inch pieces using a pizza wheel or scissors dusted with the confectioners' sugar mixture. Once cut, lightly dust all sides of each marshmallow with the remaining sugar mixture and store in an airtight container for up to a week.
They are fun to make and I plan on experimenting with them soon...I am thinking chocolate covered marshmallows...what do you think?
I am quite proud of my creations for the party!
The idea for the cake was found in a "Family Fun" magazine. I love the fact that it was created by putting cupcakes together! Cupcakes are so much easier than a big cake for kids parties.


I have recently discovered how to make marshmallows. For his party I dyed them yellow so that the kids could have edible gold pieces for their goody bags! I used Alton Browns recipe:
Ingredients
3 packages unflavored gelatin
1 cup ice cold water, divided
12 ounces granulated sugar, approximately 1 1/2 cups
1 cup light corn syrup
1/4 teaspoon kosher salt
1 teaspoon vanilla extract
1/4 cup confectioners' sugar
1/4 cup cornstarch
Nonstick spray
Directions
Place the gelatin into the bowl of a stand mixer along with 1/2 cup of the water. Have the whisk attachment standing by.
In a small saucepan combine the remaining 1/2 cup water, granulated sugar, corn syrup and salt. Place over medium high heat, cover and allow to cook for 3 to 4 minutes. Uncover, clip a candy thermometer onto the side of the pan and continue to cook until the mixture reaches 240 degrees F, approximately 7 to 8 minutes. Once the mixture reaches this temperature, immediately remove from the heat.
Turn the mixer on low speed and, while running, slowly pour the sugar syrup down the side of the bowl into the gelatin mixture. Once you have added all of the syrup, increase the speed to high. Continue to whip until the mixture becomes very thick and is lukewarm, approximately 12 to 15 minutes. Add the vanilla during the last minute of whipping. While the mixture is whipping prepare the pans as follows.
For regular marshmallows:
Combine the confectioners' sugar and cornstarch in a small bowl. Lightly spray a 13 by 9-inch metal baking pan with nonstick cooking spray. Add the sugar and cornstarch mixture and move around to completely coat the bottom and sides of the pan. Return the remaining mixture to the bowl for later use.
When ready, pour the mixture into the prepared pan, using a lightly oiled spatula for spreading evenly into the pan. Dust the top with enough of the remaining sugar and cornstarch mixture to lightly cover. Reserve the rest for later. Allow the marshmallows to sit uncovered for at least 4 hours and up to overnight.
Turn the marshmallows out onto a cutting board and cut into 1-inch squares using a pizza wheel dusted with the confectioners' sugar mixture. Once cut, lightly dust all sides of each marshmallow with the remaining mixture, using additional if necessary. Store in an airtight container for up to 3 weeks.
For miniature marshmallows:
Combine the confectioners' sugar and cornstarch in a small bowl. Line 4 half sheet pans with parchment paper, spray the paper with nonstick cooking spray and dust with the confectioners' sugar mixture.
Scoop the mixture into a piping bag fitted with a 1/2-inch round piping tip. Pipe the mixture onto the prepared sheet pans lengthwise, leaving about 1-inch between each strip. Sprinkle the tops with enough of the remaining cornstarch and sugar mixture to lightly cover. Let the strips set for 4 hours or up to overnight.
Cut into 1/2 inch pieces using a pizza wheel or scissors dusted with the confectioners' sugar mixture. Once cut, lightly dust all sides of each marshmallow with the remaining sugar mixture and store in an airtight container for up to a week.
They are fun to make and I plan on experimenting with them soon...I am thinking chocolate covered marshmallows...what do you think?
Saturday, June 4, 2011
A Small Part of our "Feast" Tonight
This evening we are having my inlaws and good family friends over for dinner. This is our menu for this evening:
We will start out with a cheese platter, followed by:
Beef and Shrimp Kabobs
Bismati Curried Rice
Salad
Cucumber Salad
Peasant Bread
For dessert we have made four different kinds of sorbet, strawberry, grapefruit, lemon and orange.
To accompany the sorbets we will have balsamic truffles along with ginger cookies.
Because I am guarding my truffle recipes, I will share my ginger cookie recipe. I found it on Foodnetwork.com. I made a few changes and am quite pleased with the results!
Ginger Cookies
3/4 cup butter, unsalted and softened
1 cup light brown sugar
1/4 cup molasses
1 egg
2 1/4 cups flour
2 teaspoons baking soda
1/2 teaspoon salt
1 teaspoon cinnamon
1 teaspoon ginger
1/2 teaspoon ground cloves
* I added raw sugar to roll the cookies in prior to baking*
Directions
Cream together the butter and sugar. Stir in molasses and egg. Add 1 cup of flour, baking soda, salt, cinnamon, ginger and ground cloves and stir to combine. Add remaining flour 1 cup at a time. Chill dough in freezer for 15 minutes, (because my day got crazy I chilled them for longer, and it worked great, I also kept the extra dough chilling while the rest of the batch were baking). Shape dough into 1-inch balls and roll in raw sugar. Bake on greased cookie sheet at 375 degrees for 10 minutes. (I wanted crispy cookies, so I flattened the cookies with the bottom of a glass before baking, and baked for about 15 minutes)

Monday, May 30, 2011
Salsa-ing into Summer!

This summer I want to play around with different kinds of salsa. Salsa's are incredibly healthy and a great way to get your fruits and veggies!!! They are a wonderful refreshing snack.
Yesterday we had friends over for a cookout and I concocted a wonderful fruit salsa. It was great for chips, or I also poured some over cream cheese to make a thicker spread. That was great on crackers.
Fruit Salsa
3 mangoes diced
2 kiwi's with skin off
1 pineapple (I got the kinds in the produce section what was cut and cored)
1/4 cup strawberries
1/4 of a red onion
1/4 cup of cilantro
1/2 jalapeno pepper, without seeds
Put all the ingredients in a blender or food processor and blend to desired consistency.
A Last Minute Lovliness

The other night I got creative with dinner. I didn't get the chicken breasts out in time to make my taco soup, so I had to get inventive.
It was the last week before payday, when things are a little tight, so I had to rely on what I had in my fridge and pantry.
I found spinach, feta cheese and sundried tomatoes. I always keep puff pastry in my freezer...it is so handy for things. So this is what I came up with.
Mediterranean Chicken Pizza
2 Chicken breasts
1 can chicken broth
1 package frozen chopped spinach, thawed and drained
1/4 tsp red pepper flakes
salt and pepper
1 TBLSP butter
1 TBLSP flour
1 cup milk
1 package crumbled feta cheese
1/4 tsp nutmeg
1/4 cup sundried tomatoes, drained of oil
sprinkling of pine nuts (optional)
1 sheet puff pastry
Defrost one sheet of puff pastry according to the package directions. (I left it in one big sheet this time, but next time I think I will cut it into individual pizza sizes) Place on pan and prick it with a fork.
Poach the chicken breast in the chicken broth until done, covered on medium heat. If one can of chicken broth doesn't cover the breasts, add water until they are just covered. When done and cooled shred chicken, add red pepper and salt and pepper to taste, as well as the spinach. Set aside.
Now for the sauce for the pizza. Melt the butter in a pan over medium heat, add the flour and cook for about 3 minutes. Add the milk, cook on medium low heat until thickened. Add the nutmeg and half of the package of feta. Feta doesn't melt completely, so the sauce will be a bit lumpy.
Spread sauce on puff pastry, add chicken mixture, sundried tomatoes and the rest of the feta. Bake at 400 for about 25-30 minutes, until pastry in done. Sprinkle with the pine nuts and enjoy!
*You can also make this pizza early in the day and put it in the fridge until it is time to bake!*
Wednesday, May 25, 2011
Layering Flavors
I have come to realize what layering flavors means. When I first heard the phrase the picture of a Mexican 7 Layer Dip always came to mind.
However, as I have delved into the world of food and have started making more sauces and such I have realized how you create layers in your food. These layers make even simple dishes much more flavorful.
Basically it is allowing different ingredients to shine though. I am going to use a simple tomato sauce for example:
To begin my basic tomato sauce I heat some olive oil in the pan. When is it hot I add my onions. I cook the onions till they are translucent. This releases their sugars and gives them a wonderful sweet flavor. Then I add my carrots, celery and garlic. I cook these for about 5 minutes on medium heat, and this starts their cooking process. I de-glaze the pan with either sherry or red wine, depending on what I have handy.
After that I add in my soft vegetables. Mushrooms, fresh tomato and chopped garlic. I also add any herbs at this time. Oregano, basil, tarragon and some red pepper flakes usually find their way into my pot.
I cook those for about 3-5 minutes on a medium low heat. Then I add two cans of tomato sauce and one can of diced tomatoes. A quick stir and then I add my secret ingredient.....balsamic vinegar, about a quarter cup. I taste it at this point and add salt and pepper as needed.
I let it simmer on a very low heat for about 30-45 minutes. I like a chunky tomato sauce, but you are welcome to use an immersion blender to blend it all together.
Either way, you can taste the different flavors in it. The sweetness of the onions and the tang of the vinegar come thru clearly. Each ingredient is cooked in its own time. The soft vegetables are added later because they don't need as long to cook as the carrots and such. The same with the herbs, whether fresh or dried, they don't like high heat. They need low and slow to bring out their loveliness!
So take a look at your favorite recipes...take the time to cook each ingredient, and enjoy the difference it makes!!!

Monday, May 16, 2011
Sundae's for Breakfast?!?!?

Yogurt is always something we buy, but not always something that we eat. So to keep from wasting money I have developed Breakfast Sundae's!
It is basically just a parfait, but instead of a regular bowl I serve it in a waffle bowl. Cameron gets to put whatever fruit he wants on it, and then adds some granola. It is so much fun to eat,and in his words, "a very healfy breakfast!"
Saturday, April 2, 2011
Tastes Like Greek To Me.......

For awhile I have been playing with the idea of making an "apple baklava". All the ingredients in baklava seemed to be made for apples, so yesterday I gave it a try with fantastic result. I used a basic baklava recipe from Emeril Lagasse, but changed it a bit. I love the addition of the spices in the honey sauce, it keeps it from being to sweet.
Apple Baklava
Ingredients
For the Syrup:
* 1 cup sugar
* 1 cup honey
* 3/4 cup water
* 1/2 of a lemons worth of juice
* 2 tsp cinnamon
* the zest of one lemon
* Pinch ground cloves
* Pinch ground cardamom
For the filling and dough:
* 1 pound walnuts, or a combination of walnuts, pistachios and almonds
* two apples diced very small
* 1 teaspoon ground cinnamon
* 1/4 teaspoon salt
* half a lemon's worth of juice
* 2 sticks unsalted butter
* 1 pound phyllo, thawed according to package instructions
Directions
To make the syrup: Combine the sugar, honey, water, lemon juice, cinnamon , lemon zest, cloves and cardamom in a medium saucepan. Cook over medium heat, stirring occasionally with a wooden spoon, until the sugar has dissolved. Reduce the heat to medium-low and cook until the syrup is slightly thickened, about 10 minutes. Set syrup aside to cool.
Using a Chef's knife, finely chop the nuts. (Alternatively, if you have a food processor, pulse the nuts until finely chopped.) In a medium mixing bowl, combine the nuts, cinnamon, apples, lemon juice and salt and stir well to combine.
Melt the butter over low heat in a small saucepan.
Using a pastry brush, lightly coat a 13 by 9-inch or 15 by 10-inch baking dish with some of the melted butter.
Open the package of thawed phyllo and lay the thin sheets on a clean work surface. Measure the phyllo sheets; if the type you have purchased measures approximately the same size as the baking dish you are using, then proceed from here. If they are larger than your baking dish, use a sharp knife to cut the phyllo sheets approximately the same size as your baking dish. Discard any scraps. Cover the sheets with a piece of plastic wrap and a lightly damp kitchen towel, as the sheets of phyllo dry out very quickly if left uncovered.
Position rack in center of oven and preheat the oven to 350 degrees F.
Place 1 of the sheets of phyllo in the bottom of the buttered baking dish and lightly brush with some of the melted butter. Repeat this procedure with 6 more sheets of phyllo, for a total of 7 layers. Measure about 3/4 cup of the nut mixture and spread the nut mixture evenly over the buttered phyllo sheets. Repeat with 7 more sheets of phyllo, buttering each layer as before, and top these sheets with another 3/4 cup of the nut mixture. Continue this layering process, buttering 7 sheets of phyllo and topping each 7 sheets with 3/4 cup of the nuts, until you have used all of the nut mixture. Layer any remaining sheets of phyllo on top, buttering between each layer, until all of the phyllo sheets have been used.
Use a sharp knife to make 4 cuts lengthwise through the layered phyllo at 1 1/2 inch intervals. (You should end up with 5 lengthwise strips 1 1/2 inches wide.) Now use your knife to cut diagonally across the strips at 1 1/2-inch intervals to form diamond shapes. You should end up with approximately 36 diamond-shaped pieces of baklava in the baking dish.
Bake the baklava until golden brown, about 40 minutes.
Using oven mitts or pot holders, remove the baklava from the oven and set aside on a wire rack to cool for 5 minutes. Using a ladle or small measuring cup, slowly drizzle the cooled syrup over the warm baklava. Allow to stand several hours before serving.
I brought it to our girls game night and it was met with rave reviews!!!

Thursday, March 31, 2011
Our Chef's Table Dinner

During our vacation one of the things I was looking forward to the most was our dinner at "Eleven" in Pittsburgh, because we got eat at the Chef's Table.
The Executive Chef, Derek Stevens, prepared a personal menu just for us, and served us and answered all of our questions. Because of a 24 hour stomach virus, I was not able to enjoy it as much as I would have liked, but I still got to taste each course.
Each course was a surprise, Andrew remarked that it was like Christmas morning, not knowing what to expect.
In all of my "food reading" I have heard people describe food as playful, but before that night I had never really experienced that. But our fifth course was a perfectly cooked scallop paired with Anson Mills grits, Surryano ham and a red bean relish. To me that was playful! I would have never thought to pair a delicate scallop with grits and ham, but the flavors mixed perfectly and made perfect sense.
I found this dish especially interesting because right before this course Andrew had asked the chef what his influences were, and one of the cuisine's he mentioned was Southern.....and that dish really showcased that.
I was excited to get to try a quail's egg. This was paired with white asparagus, a duck hollandaise and truffle vinaigrette. It was a perfect little bit!
I also got to try foie gras for the first time. It really does melt in your mouth like butter. The chef paired it with gooseberries and grapefruit and the acidity cut the fattiness of the foie gras perfectly.
One of Andrew's favorite things was lamb bacon. My husband loves anything lamb, and anything bacon (except for jellybeans, but that is another story). The taste was fatty, gamey and contrasted the kale and cous cous it was served with very well.
For my poor recovering stomach, the Gooseberry Soup with the pineapple-lemon verbena sorbet was heaven! Delicate slices of blood orange floated in the soup along with toasted black sesame seeds which provided a lovely texture contrast.
To finish the meal, the pastry chef brought out a Chocolate and Peanut Crunch Cake. It tasted the way a Whatchmacallit should taste. There was a small scoop of the darkest, smoothest chocolate icecream that I have ever tasted!
The other courses included a Smoked Artic Char with pecans, granny smith apples and a horseradish vinaigrette. I was afraid the horseradish would overwhelm the fish, but it really made the flavors dance across my tongue. We also enjoyed a raw tuna with citrus, cucumber, edamame and sesame broth. The edamame was a surprising crunch, and really rounded out the dish. Andrew and I had never had Golden Tilefish before that night. That was paired with perfectly cooked clams and a lobster broth.
Reading about the food we ate makes me want to go back. It really was a wonderful experience, and one I hope to repeat.....this time without a stomach bug!
Tuesday, March 29, 2011
A Wonderful, Fantastic Bread Recipe

I made this bread on St. Patricks Day, but between a sick husband and getting ready to go on vacation, this is the first chance I have had to post about it!
It is a No Knead Peasant Bread. It takes a while, especially the two risings, but it is worth the wait! You bake it in a cast iron dutch oven, by doing this the bread is crusty and just the thing to pair with soups, stews, and we paired it with corned beef and cabbage for St. Patricks Day.
No Knead Peasant Bread
2 1/2 cups bread flour
1/2 cup whole wheat flour
1/2 tsp active dry yeast
1 1/2 tsp salt
All purpose flour for dusting
Combine the bread flour, whole wheat flour, yeast and salt in a large bowl. Add 1 1/2 cups lukewarm water and mix with your hands or a spoon until the dough comes together, it will be wet and sticky. Cover the dough tightly with plastic wrap. If you have extra time, refrigerate 12 to 24 hours. It is not necessary but will improve the flavor of the bread. ( I let it rise about 6 hours in the fridge and it worked our great, also, I used the water and a bit of sugar to proof the yeast.)
Let the dough rise, covered at room temperature for about 18 hours. This rise is necessary whether you refrigerate the dough first or not. The surface will be bubbly after rising.
Generously dust a work surface with all purpose flour. Turn the dough out onto the flour then sprinkle flour on top. Fold the top and bottom of the dough into the center, then fold in the sides to make a free form square. Use a dough scraper or a spatula to durn the dough over, then tuck the corners to form a ball.
Line a baking sheet with parchment paper and generously dust with flour. Transfer the dough to the baking sheet, seam side down, and sprinkle with more flour. Cover with a cotton kitchen towel (do not use terry cloth) and let rise and room temperature until doubled in size, 2 to 3 hours.
Position a rack on the bottom of the over and place a 2 or 4 quart cast iron or enameled Dutch oven ( without the lid) on the rack. Preheat the oven to 450 for at least 30 minutes. When the dough has doubled, carefully transfer the hot pot to a heatproof surface. Uncover the dough, lift up the parchment and quickly invert the dough into the pot (shake the pot to center the dough if necessary). Cover with the lid and bake 30 minutes then uncover and bake until brown and crusty, 15-30 minutes. Turn out onto a rack to cool
Friday, March 11, 2011
Way To Spend A Rainy Day
Yesterday it poured all day! While I was watching the river grow in our yard I decided to bake. So while it was altogether dreary outside, inside it was warm and toasty and smelling delicious!
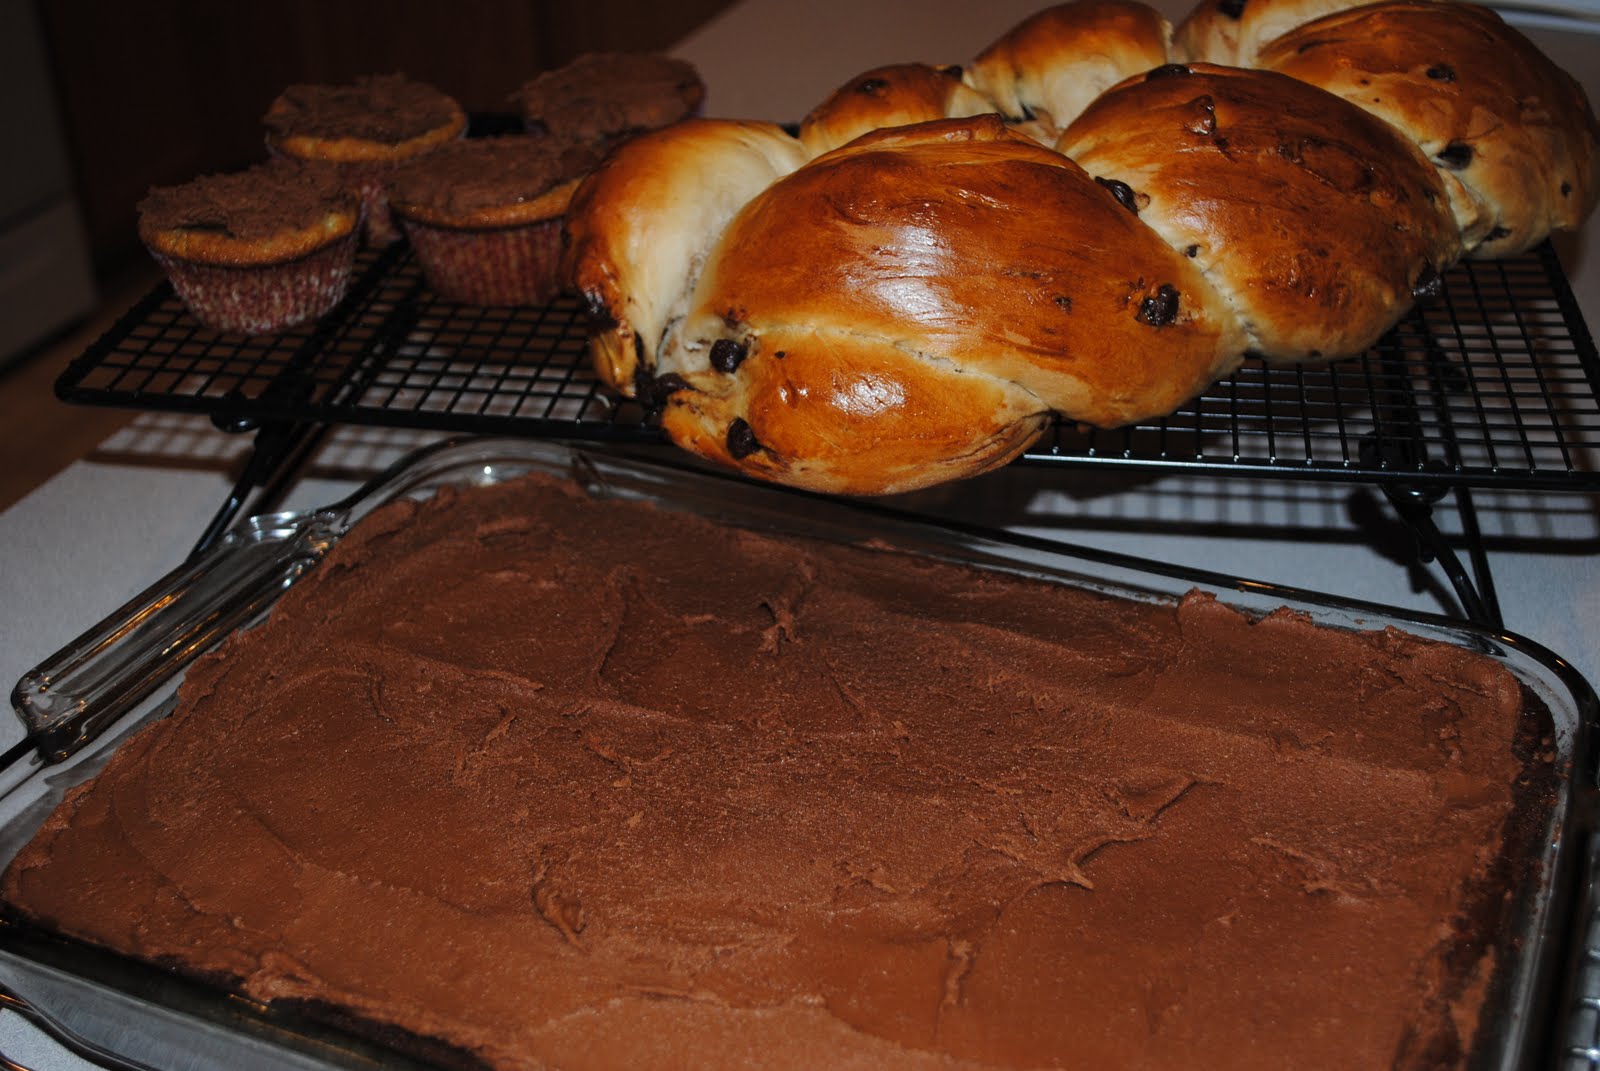
One of the things I made yesterday was a recipe I found in Penzey's Spices catalog. I didn't have all of the ingredients, so I will share the original recipe, and let you know what I substituted. The cake turned out moist and fluffy! The icing had a wonderful mocha flavor since you used coffee with the chocolate!
Gram's Banana Cake
2 1/2 cups sugar
1 cup butter
4 eggs
1 cup sour cream ( I used 1 cup plain yogurt)
3 cups all purpose flour ( I used 1 1/2 cups flour and 1 1/2 cups wheat flour)
1 TBSP pure vanilla extrace
2 1/2 cups mashed banana
Preheat oven to 350. Grease and flour 3 9" cake pans ( I used a 9x13 and it made enough for that and about 6 cupcakes).
Mash the bananas and set aside.
Cream the butter and sugar together until well mixed. Add the eggs and beat well. Mix in sour cream (yogurt).
In separate bowl, sift together flour and baking soda. Add to creamed mixture and beat well. Add the mashed bananas and vanilla and mix well.
Pour into pans and bake for 30-40 min.
(Using the pans I used, the cupcakes were done in about 20 minutes and the cake in about 50 minutes)
The other recipe I tried yesterday was a Chocolate Chip Challah Bread. Really yummy! Whatever we don't eat today I plan on making into French Toast tomorrow morning!
Chocolate Chip Challah Bread
2 packets active dry yeast
1/2 cup of sugar, plus a ping
7 cups flour, plus more for dusting
1 TBSP salt
2 large eggs
1/2 cup veg. oil, plus more for the bowl
1 cup chocolate chips
Preheat oven to 375. Mix the yeast, a pinch of sugar and 1 cup warm water in a small bowl. Set aside while you measure the other dry ingredients or until frothy.
Whisk 3 1/2 cups flour, the remaining 1/2 cup sugar and salt in a large bowl. pour in the yeast mixture and stir with a wooden sppon
Add one egg, the veg. oil and 1 cup of warm water. Stir till combined. Gradually stir in the remaining flour until the dough starts to come together. Mix in the chocolate chips.
Turn the dough out onto a floured surface and knead until smooth, about 8 min. Transfer to a large oiled bowl, cover with plastic wrap and let rise in a warm place for 1 hour and 30 minutes.
Divide the dough into 3 equal portions. On a floured surface, roll each portion into a ball, then roll each ball into 1 1/2 to 2 inch wide strand about 16" long. Lay the strands side by side on a sheet of parchment paper and pinch them together at one end.
Braid the 3 strands. Once braided pinch the dough together at the end.
Slide the loaf, with the parchment paper, onto a baking sheet. Beat the remaining egg with 1 TSBP water in a small bowl, then brush the egg wash all over the loaf, bake until golden brown, about 30 minutes.
Tuesday, March 8, 2011
Lemon Bars
When I was recovering from my gall bladder surgery my friends stepped in and provided dinners for my family. The one things my husband couldn't stop talking about was my friend Karen's Lemon Bars. So I had to find out the recipe, and I thought I would share!
Lemon Bars
2 cups all purpose flour
1 cup confectioners sugar
1 cup butter melted
4 eggs
2 cups white sugar
1 tsp baking powder
1/4 cup all purpose flour
1/2 cup lemon juice
Preheat oven to 350 degrees and grease a 9x13 pan
in a medium bowl stir together 2 cups flour and confectioners sugar. Blend in the melted butter. Press into the bottom of the prepared pan.
Bake for 15 minutes or until golden.
In a large bowl beat eggs until light combine the sugar, baking powder and 1/4 cup of flour. stir the sugar mixture into the eggs. Finally stir in the lemon juice. Pour over the prepared crust and return to oven
Bake for 30 more minutes
Allow to cool before you cut
Two Of My Favorite Things!

I have found a new addiction. I love to cook, and I love to read, and now some authors have combined the two, in what I am calling "Food Lit". I love it! Not only do I get a story, but I also get recipes to try as well!
Stacey Ballis and her novel, "Good Enough To Eat" was the first book I read in this wonderful genre, and I loved it! Again, she combined two of my favorite things!
The recipe I want to share today if from "How to Bake a Perfect Life" by Barbara O'Neal. Another great book. The recipe's all revolve around bread products...which is one of my favorite things!
Hearty Berry Streusel Muffins
Makes 30-32
These are great, filling muffins. Because of the lack of fat, the have a heavier texture,but the flavor is outstanding! Plus, they are healthier for you!
1 1/2 cups white flour
1 cup whole wheat flour
1 cup oats
1 TBSP baking powder
1 tsp baking soda
1/2 tsp sea salt
1 cup honey
1 1/2 cups plain yogurt
1 6 oz container raspberry or blueberry yogurt
1/2 cup milk
3 TBSP canola oil
2 tsp vanilla extract
1 large egg
1 cup each fresh blueberries and raspberries
Streusel
1/4 cup four
3 TBSP brown sugar
1/4 cup chopped, lightly toasted walnut, pecans or almonds
1 1/2 TBSP butter melted
Prepare muffin tines with paper or oil. Prepare streusel first and set aside.
For Muffins: Mix dry ingredients well. In a separate bowl, mix all wet ingredients except berries and beat together well. Pour wet ingredients into the dry mix and beat firmly and quickly just until thoroughly moistened. Add berried and fold in gently. Divide batter into muffin tins and bake at 400 degrees for 15 minutes. Cool for 15 minutes in the pan to set the berries, remove from pan and cool on wire rack.

Reagan enjoying the fruits of my labor!
Friday, February 11, 2011
Side Dish Satisfaction
Imaginative side dishes tend to be my downfall. We tend to rotate through rice, potatoes, sweet potatoes and bread.
To me side dishes were more of an afterthought with most of my energy going toward the main dish, but I was getting bored,so I decided to shake things up.
I decided to do some simpler main dishes and become more "fun" with my sides.
The other night we had steak, and I simply cooked it, but paired it with "French Onion Mac n Cheese". I found the recipe in Food Network Magazine, but changed a few things to make it more "budget" friendly!
French Onion Mac n Cheese
1/2 box of ziti cooked according to the box instructions
4 TBSP butter
1 Onion, thinly sliced
2 TBSP flour
1/4 tsp grated nutmeg
salt and pepper
2 cups whole milk
2 cups shredded swiss cheese.
Cook the pasta according to the package instructions, set aside.
In a saucepan melt 2 TBSP of butter. Add sliced onion and cook until carmelized (a golden brown). Once onions are carmelized add the remaining butter and flour, cook for about 3-5 minutes.
Add milk and cook on medium heat until thickened. Add nutmeg and salt and pepper to taste. Add the swiss cheese and stir until melted.
Add the ziti in and stir to combine.
(You can serve this immediately or place it in an oven safe dish and reheat covered at 350 degrees for 30 minutes, then uncover and continue heating for another 15 minutes)
Tuesday, February 8, 2011
A Little Something Different
Every once in awhile I like to challenge myself to come up with a different way to serve a dinner.
Last night porkchops and sweet potatoes were on the menu. Usually I just fry up the porkchops with a little salt and pepper, and mash up the sweet potatoes and everyone is happy. Last night I decided to do a little something different. I used two recipes for inspiration, from both Jacques Pepin and Tyler Florence, here is what I came up with.
Stuffed Porkchops
2 TBSP Butter
1 onion, diced
1/4 cup sliced mushrooms
1 pkg chopped frozen spinach, thawed
1/4 cup breadcrumbs
salt
pepper
2 tsp lemon juice
4 pork chops, no bone
Saute onion and mushrooms in 1 TBSP butter until soft, add spinach and saute for about 5 more minutes. Take off heat and cool until room temperature. (I make this around lunchtime so it has time to cool)
Add breadcrumbs, salt, pepper, lemon juice and mix together. Set aside.
Cut pockets in each porkchop. Stuff the stuffing into the pockets.
Melt remaining butter in a saucepan and sear each side of the porkchops.
After searing bake in a 400 degree oven for about 25 minutes, or until cooked thru, temp. 160.
Sweet potatoes are another favorite in our house. This is a simple recipe that includes another one of my favorite, balsamic vinegar!
Balsamic Sweet Potatoes
2 large sweet potatoes
1 cup balsamic vinegar
1/4 cup craisins
2 TBSP brown sugar
Peel and very thinly slice the sweet potatoes. Lay in a shallow baking pan, or even a cookie sheet would work well. Bake in a 400 degree oven for about 30 minutes.
While the potatoes are baking, put vinegar and brown sugar in a saucepan on the stove. Bring to a boil and then add the craisins. Turn down to low heat and let it reduce to about half.
Bring the potatoes out of the oven and drizzle with vinegar reduction.
Tuesday, January 25, 2011
A Citrus Twist

Last night roast chicken was on the menu. As I was looking around the house I noticed that we had a bunch of oranges/clementines on their last legs. So I decided to use them through out the dinner, and ended up with a very tasty concoction!
Roast Chicken
1 roasting chicken
2 onions cut into four pieces
2 cloves of garlic smashed
A total of 4 Tbsp minced ginger root
zest from 2 clementines
juice from 4 clementines
2 Tbsp honey
2 Tbsp butter
salt/pepper
Take one onion, garlic and 2 Tbsp of ginger root and lay them in the bottom of the roasting pan.
Combine zest, juice and honey in a bowl and set aside. Slide the 2 Tbsp of butter under the skin of the chicken.
Rub zest, juice and honey mixture onto the chicken, sprinkle top with salt and pepper. Place chicken in pan and roast according to directions for your size chicken
(just a note, because of the honey the skin will look "burned" before the chicken is ready, don't worry, and just continue cooking until the chicken is done)
We still had more oranges left, so I decided to use some memories of my childhood to make a wonderful carrot dish. My mom got a recipe from my grandmother that included orange carrots, so I just kinda updated it!
Orange/Ginger Carrots
Juice and zest two oranges. Dice up about 1 Tbsp ginger root. Place in bottom of steamer. Add water to fill to proper level. Places baby carrots in pan and steam on medium heat for 45 minutes, or until tender.
To finish off the dinner I used one of my favorite Barefoot Contessa recipes for Cornbread Stuffing. I had leftover cornbread from the other night when we had chili, so it was perfect!
1 onion, diced
1 stick of butter
3 stalks of celery, chopped
3 Tbsp fresh parsley chopped
1/2 cup chicken broth
5 cups crumbled cornbread
Melt butter in large pot, add onion and cook for about 8 minutes, until onion is soft. Add celery, parsley, broth and cornbread. Mix until bread is moistened. Put in shallow baking dish and bake until heated through. ( I just put it in beside the chicken, and it works really well. It takes about 30-40 minutes to heat through)
It was a really great dinner, with alot of flavor!
Monday, January 17, 2011
My First Reveiw

As you know this blog has been all about my cooking so far. But this post is going to be a bit different.
Last night Andrew took my out for my birthday. Usually when we go out we go for sushi, but I wanted something different for my birthday. After exhaustive research I decided we should try, "Victoria's Gastro Pub" in Columbia, MD. The main reason for this decision.....they serve french fries fried in duck fat!
When we arrived I was surprised to see how busy they were for a Sunday night. Even so, we were seated at our table with in 10 minutes, which was the time the hostess gave us for the wait.
I immediately liked the decor. We were surrounded by dark wood and burgandy walls. The lighting fixtures reminded me of what you would expect to see in a castle, they were made of iron and had "pillar candles" surrounding the bulbs.
After looking over the wine list I decided on a Malbac. The description they provided was perfect for the wine. It was very drinkable and had a nice body to it.
We ordered to appetizers to start with , the duck fat fries and their meat platter.
The food arrived...and oh my goodness! They fries were everything we wanted them to be. The duck fat provided a gaminess that went perfectly with the earthiness of the potatoes. The aioli that came with them cut the richness of the dish quite nicely. They were 7.00 and totally worth every cent.
The meat plate had smoked duck, a patte' as well as a homemade prosciutto. To accompany the meat there was a wonderful grainy mustard that you could tell was made in house. There was also homemade bread and butter pickles, which Andrew and I "fought" over. Olives and grilled baguette were also included.
After we finished those we decided that we were too full to eat another thing! We ended our meal with coffee. Andrew had a cappuccino, while I decided to live a little and had what they called "Toffee Coffee". It was a wonderful concoction of coffee, hot chocolate, Kahlua and Bailey's topped with a healthy serving of real whipped cream.
It really was a wonderful experience, from the atmosphere, to the service, to the food, Victoria's Gastro Pub lived up to our expectations. Next time we hope to save some room to try some of the entrees.....
Tuesday, January 11, 2011
Ultimate Comfort
I spent a portion of the wee hours on Saturday morning in the ER with my son and the attack of the croup.
When I got home I was still riding high on adrenalin and caffeine so I decided to put together our dinner then, so all I had to do later was warm it up.
I decided to do stuffed shells. I didn't have the frozen spinach that I thought I had so I used some of my leftover spanakopita filling along with caramelized onions and ricotta cheese for the filling. For the sauce I sauteed some onions, garlic, carrots and celery. Then I added a jar of roasted red peppers, diced tomatoes and tomato sauce. I let it simmer for about 30 minutes and then used my immersion blender to blend it all together. Topped with mozzarella cheese it was a wonderful comforting dinner.
I have been looking for an Italian bread recipe that has a very crusty crust with a wonderful chewy inside. I found one online and it was wonderful. Check out "cooklikeyourgrandmother.com". I plan on trying some other recipes I found on there really soon!
For dessert I made a lemon glazed pound cake. I used a recipe from my favorite baking cookbook "The King Arthur Flour Baker's Companion". I would be lost without this book. Here is the recipe:
14 TBS butter
3 oz cream cheese
1/2 tsp salt
1 1/2 cups sugar
1 tsp baking powder
2 tsp vanilla extract
1/2 tsp lemon zest
1 3/4 cups all purpose flour
5 eggs
Glaze
1/4 cup lemon juice
1/2 cup sugar
Preheat the oven to 350 and grease a bundt style pan.
In a medium sized mixing bowl, beat together the butter and cream cheese until soft and fluffy. Add salt, sugar, baking powder, vanilla, lemon and flour and beat for 5 minutes, batter will be stiff.
Add 1 egg beating until well combined. Continue to add the eggs, one at a time beating well and scraping the sides and bottom of the bowl after each addition.
When done the batter will be very fluffy. Spoon the batter into the prepared pan.
Bake the cake for 55 to 60 minutes, or until a cake tester inserted into the center comes out clean.
Just before the cake is done, combine the lemon juice and sugar and heat over low heat until the sugar had dissolved, don't let the mixture boil.
Remove the cake from the oven and let it cool for 10 minutes in the pan. Turn it out onto a wire rack or serving platter. Poke the top all over with a cake tester or toothpick and gradually drizzle the glaze over it, pausing occasionally to let it sink in. Let the cake cool for several hours before slicing.

Overall it was a wonderfully comforting dinner...and very delicious too!
Subscribe to:
Posts (Atom)